How to Use QuickBooks Online (Step-by-Step Beginner Guide 2026)
How to Use QuickBooks Online: Complete Step-by-Step Guide for Beginners (2026)
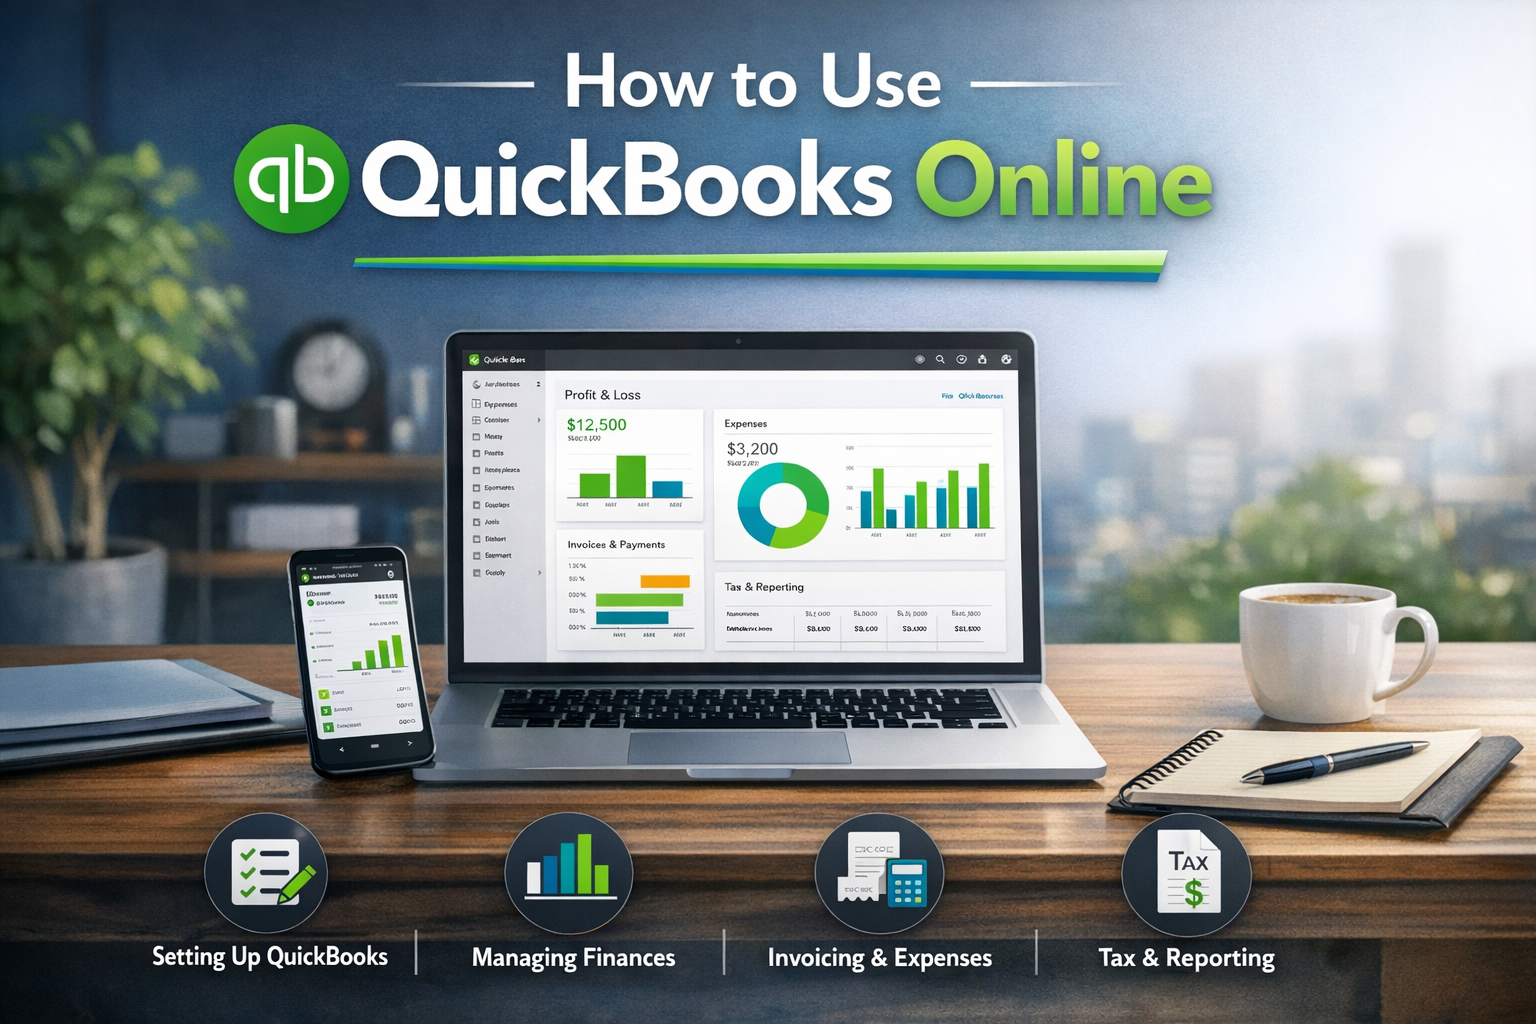
If you are new to QuickBooks Online, the software may feel overwhelming at first. But once you understand the basic workflow, it becomes one of the most powerful accounting tools for managing day-to-day bookkeeping. In this guide on how to use QuickBooks Online, we will walk you through essential tasks such as creating customers and vendors, recording invoices and bills, managing credit notes and debit notes, performing bank reconciliation, categorizing uncategorized transactions properly, syncing bank accounts, and integrating QuickBooks Online with other software.
Table of Contents:
- Who Should Read This Guide
- Understanding the Workflow in QuickBooks Online
- How to Sync Bank and Credit Card Accounts
- How to Create Customers in QuickBooks Online
- How to Create Vendors in QuickBooks Online
- How to Create an Invoice in QuickBooks Online
- How to Record a Vendor Bill in QuickBooks Online
- How to Record Credit Notes and Vendor Credits
- How to Categorize Transactions in QuickBooks Online
- How to Create Bank Rules in QuickBooks Online
- How to Perform Bank Reconciliation in QuickBooks Online
- Integration of QuickBooks Online with Other Software
- Always Maintain a Proper Chart of Accounts
- Set Up Products and Services Correctly
- Review Aging Reports for Receivables and Payables
- Lock Prior Periods After Closing to Prevent Changes
- Regular Review of Financial Statements Ensures Data Accuracy
- Best Practices for Accurate Books
- How to Use Classes for Business, Category, or Property Tracking
- Common Mistakes to Avoid
- Frequently Asked Questions
- Final Thoughts
Who Should Read This Guide
This guide on how to use QuickBooks Online is designed for:
• Small business owners
• Startups
• Freelancers
• Bookkeepers
• CPA firms
• Businesses switching from Excel to accounting software
If you are managing daily bookkeeping or overseeing finance operations, this QuickBooks Online guide will help you build a strong accounting foundation.
Understanding the Workflow in QuickBooks Online
Before entering transactions, it is important to understand the accounting flow. In QuickBooks Online, money coming in is recorded through invoices or sales receipts, while money going out is recorded through vendor bills or expenses. Bank feeds help match entries, and bank reconciliation ensures your records remain accurate. Once you understand this cycle, QuickBooks Online becomes structured and predictable rather than confusing.
How to Sync Bank Accounts and Credit Cards in QuickBooks Online
One of the most powerful features of QuickBooks Online is bank feed integration. To sync bank and credit card accounts,
Go to Banking or Transactions → Link Account.
Search for your bank,
Log in securely, and select the accounts you want to connect.
Once connected, transactions automatically import into QuickBooks Online. This reduces manual data entry and helps you categorize transactions quickly. Regular syncing ensures your books stay updated in real time and makes bank reconciliation in QuickBooks Online much smoother.
How to Create Customers in QuickBooks Online
To create a customer in QuickBooks Online, go to Sales → Customers → New Customer. Enter the customer’s name, email address, billing address, phone number, and payment terms such as Net 15 or Net 30. You can also add notes or attach documents if required. Creating customers properly helps QuickBooks automatically populate details when you create invoices, estimates, or receive payments. This keeps accounts receivable organized and reduces manual data entry. A customer should be created whenever your business sells products or services on credit or needs to track sales by individual client. For example, if a consulting company starts working with a new client and plans to send monthly invoices, setting up the customer profile ensures that invoices, payments, and outstanding balances can be tracked accurately for that specific client.
How to Create Vendors in QuickBooks Online
To create a vendor in QuickBooks Online, go to Expenses → Vendors → New Vendor. Enter the vendor’s business name, contact information, email address, and payment terms. You may also include tax information or notes related to the vendor. Creating vendors ensures that bills, payments, and expenses are recorded against the correct supplier and appear correctly in accounts payable reports. A vendor should be created whenever your business purchases goods or services from a supplier and needs to track outstanding bills or payment history. For instance, if a business hires a marketing agency for advertising services or regularly purchases inventory from a supplier, creating a vendor profile allows you to record bills, track payables, and monitor how much is owed to that specific vendor.
How to Record an Invoice in QuickBooks Online
To record an invoice in QuickBooks Online, click + New → Invoice. Select the customer, choose the product or service being sold, enter the quantity, rate, and payment terms, and then save the invoice. When an invoice is created, QuickBooks automatically records income and increases accounts receivable, showing that the customer owes money to the business. Invoices should be created whenever goods or services are delivered but payment has not yet been received. For example, if a digital marketing agency completes a monthly service for a client and allows the client 30 days to pay, an invoice is generated to formally request payment and track the outstanding amount until the client pays.
How to Record Vendor Bills in QuickBooks Online
To record a vendor bill in QuickBooks Online, click + New → Bill. Select the vendor, enter the bill date, due date, amount, and assign the appropriate expense or cost account. Recording a bill increases accounts payable, indicating that the business owes money to a supplier. This method is used when expenses are incurred but payment will be made later. For example, if a company receives a monthly internet bill or office rent invoice that will be paid in the next few weeks, recording it as a vendor bill helps track liabilities and ensures accurate financial reporting. Once the payment is made, the bill can be cleared by recording a bill payment, which reduces accounts payable and updates the vendor balance.
How to Record Credit Notes and Debit Notes in QuickBooks Online
In QuickBooks Online, customer credit notes are recorded using the Credit Memo option. To create one, click + New → Credit Memo, select the customer, enter the product or service details, quantity, rate, and the amount that needs to be credited. Once saved, the credit memo reduces the customer’s outstanding balance and adjusts the recorded revenue accordingly. Credit memos are typically created when a customer returns goods, when an overcharge needs to be corrected, or when a business offers a price adjustment after issuing an invoice. For example, if a company invoices a client for $1,000 but later agrees to reduce the amount by $100 due to a service issue or pricing correction, a credit memo can be issued. This ensures the accounts receivable balance and income records remain accurate while maintaining a proper audit trail of the adjustment.
Vendor debit notes, known as Vendor Credits in QuickBooks Online, are recorded by selecting + New → Vendor Credit. Choose the vendor, enter the details of the returned goods or expense correction, and assign the appropriate expense or cost account. Recording a vendor credit reduces accounts payable and adjusts the expense that was previously recorded. Vendor credits are usually created when goods purchased from a supplier are returned, when the supplier grants a discount after billing, or when a billing error needs correction. For instance, if a business receives a vendor bill for office supplies worth $500 but later returns items worth $80 due to defects, a vendor credit can be recorded for $80. This reduces the payable amount and ensures that the expense and liability recorded in the books reflect the actual transaction.
How to Categorize Uncategorized Transactions in QuickBooks Online
When bank and credit card feeds are connected to QuickBooks Online, new transactions automatically import into the “For Review” tab within the Banking section. These transactions remain uncategorized until they are reviewed and assigned to the correct income or expense account. To categorize a transaction, open the Banking tab, review the transaction details, select the appropriate category such as office expenses, utilities, software subscriptions, or sales income, and then click Add to record it in the books. Proper categorization ensures that financial reports like the Profit and Loss statement accurately reflect business income and expenses.
Categorizing transactions is typically required when the bank feed brings in payments, deposits, or expenses that QuickBooks cannot automatically identify. For example, if a monthly payment to a software provider appears in the bank feed, it should be categorized under Software or Subscription Expenses rather than being left uncategorized. Similarly, customer payments received through the bank should be categorized as income or matched with an existing invoice to correctly update accounts receivable.
Create Bank Rules in QuickBooks Online for categorisation
To improve efficiency and maintain consistency, businesses can create bank rules for recurring transactions. Creating bank rules in QuickBooks Online helps automate the categorization of recurring transactions and reduces manual bookkeeping effort. To create a rule, go to Transactions → Rules and click New Rule. Give the rule a clear name, select the bank account, and define the conditions such as description contains, amount equals, or transaction type. Then choose the appropriate expense or income category and any additional details like class or vendor. Once saved, QuickBooks Online will automatically apply this rule to matching transactions in the bank feed. The objective of creating rules is to improve efficiency and consistency in transaction classification. The key benefit is time savings, reduced errors, and more standardized bookkeeping, especially for recurring expenses like rent, subscriptions, software payments, or merchant fees.
Bank Reconciliation Process in QuickBooks Online
Bank reconciliation in QuickBooks Online ensures that your accounting records match your bank statement at the end of each month. The primary objective of reconciliation is to verify accuracy, detect errors, and confirm that all transactions are properly recorded. To perform bank reconciliation in QuickBooks Online, go to Settings → Reconcile, enter the statement ending balance and statement date, and then match the cleared transactions shown in your bank statement with those recorded in QuickBooks. The reconciliation difference should be zero. If there is a discrepancy, review for missing entries, duplicate transactions, or incorrect amounts.
The benefit of regular bank reconciliation is strong financial control. It helps identify fraud, prevent reporting errors, improve cash flow visibility, and ensure that your Profit and Loss statement and Balance Sheet reflect accurate numbers. Monthly reconciliation builds confidence in your financial data and makes audits, tax filing, and decision-making much smoother.
Integration of QuickBooks Online with Other Software
One major advantage of QuickBooks Online is its ability to integrate with leading financial tools. It connects seamlessly with platforms like Bill.com for accounts payable automation, Ramp for corporate card expense management, Stripe for payment processing, PayPal, Shopify, Gusto for payroll, and many other third-party applications. These integrations allow automatic syncing of bills, payments, expenses, and payroll data directly into QuickBooks Online. This reduces manual work, improves accuracy, and creates a connected financial ecosystem.
Always Maintain a Proper Chart of Accounts in QBO
A well-structured chart of accounts is the backbone of QuickBooks Online because it defines how every financial transaction is classified within your system. It determines where your income, expenses, assets, liabilities, and equity entries are recorded, which directly impacts the accuracy of your Profit and Loss statement and Balance Sheet. Before recording transactions, take time to design a logical and scalable chart of accounts that aligns with your business model. Avoid creating duplicate or overly detailed accounts that make reports cluttered and difficult to analyze. Instead, maintain clear, consistent categories that allow meaningful financial insights. A clean and organized chart of accounts not only improves reporting accuracy but also simplifies tax preparation, reconciliation, and financial decision-making.
Set Up Products and Services Correctly in Quickbooks
In QuickBooks Online, setting up products and services properly is essential for accurate bookkeeping and financial reporting. To configure this, go to Sales → Products and Services → New, and create items that represent the goods or services your business sells or purchases. Each product or service should be mapped to the correct income account for sales or expense/cost of goods sold account for purchases. Proper configuration ensures that when you create an invoice in QuickBooks Online or record a vendor bill, the system automatically posts entries to the correct accounts without requiring manual adjustments. This setup is especially important for businesses that invoice customers frequently or manage inventory or service-based billing. For example, if a consulting firm creates a service item called “Consulting Fees” linked to a consulting income account, every invoice generated using that item will automatically record revenue under the correct income category, keeping financial reports consistent and accurate.
Review Aging Reports for Receivables and Payables
Regularly reviewing aging reports is an important practice for maintaining healthy cash flow and managing outstanding balances. In QuickBooks Online, aging reports such as Accounts Receivable Aging Summary and Accounts Payable Aging Summary show how long invoices or vendor bills have remained unpaid, typically categorized into periods like current, 30 days overdue, 60 days overdue, and beyond. These reports help businesses identify customers who have delayed payments and vendors whose bills are approaching due dates. Reviewing these reports regularly allows businesses to follow up with customers for overdue invoices and plan payments to vendors on time. For example, if an invoice appears in the 60-day overdue category, it indicates the need for immediate follow-up with the customer to avoid cash flow issues. Similarly, reviewing vendor aging reports helps ensure that important supplier payments are not missed, maintaining good business relationships.
Lock Prior Periods After Closing to Prevent Changes
Once a month or financial year has been finalized, it is a best practice to lock the accounting period in QuickBooks Online. This can be done through Settings → Accounts and Settings → Advanced → Close the Books, where you can set a closing date and optionally require a password to make any changes to that period. Locking prior periods prevents accidental edits, deletions, or backdated entries that could alter previously finalized financial statements. This step is particularly important after financial reports have been reviewed, tax returns have been filed, or management decisions have been made based on those numbers. For example, if a business has closed its financial year and finalized its Profit and Loss statement, allowing changes in that period could unintentionally affect revenue or expense totals. Locking the books ensures data integrity and maintains a reliable audit trail.
Regular Review of Financial Statements Ensures Data Accuracy
Consistently reviewing financial statements in QuickBooks Online is essential to ensure that accounting data accurately reflects the true financial position of the business. Key reports such as the Profit and Loss statement, Balance Sheet, and Cash Flow statement provide insights into revenue, expenses, assets, liabilities, and overall business performance. By reviewing these reports regularly—such as monthly or quarterly—business owners and accountants can quickly identify unusual transactions, classification errors, or missing entries. For instance, if the Profit and Loss statement shows unusually high expenses in a specific category, it may indicate a misclassified transaction that needs correction. Similarly, reviewing the Balance Sheet helps verify that bank balances, receivables, and payables match supporting records. Regular monitoring not only improves bookkeeping accuracy but also supports better financial planning, budgeting, and decision-making for the business.
Best Practices for Accurate Books in QBO
Maintaining accurate books in QuickBooks Online requires consistency, discipline, and regular review. Record transactions on time, avoid backdated entries, and ensure every income and expense is properly categorized. Reconcile bank and credit card accounts monthly to detect discrepancies early. Review accounts receivable and accounts payable aging reports to monitor outstanding balances, and periodically verify that your chart of accounts remains clean and structured. Most importantly, review your financial statements at the end of each month to confirm that the numbers reflect the true financial position of your business. Following these best practices ensures reliable reporting, smoother audits, and better financial decision-making.
How to Use Classes for Business, Category, or Property Tracking
QuickBooks Online allows you to use Classes to track income and expenses separately for different segments within the same company file. This is extremely useful if you manage multiple business divisions, service categories, or properties. For example, if you operate three rental properties, you can create separate classes such as “Property A,” “Property B,” and “Property C.” When recording rent income or maintenance expenses, simply assign the relevant class to each transaction. This allows you to generate a Profit and Loss report by class and instantly see which property is profitable and which one needs attention. Similarly, a company offering accounting and tax services can create classes like “Bookkeeping,” “Tax Preparation,” and “Advisory” to track performance by service line. Using classes properly gives deeper financial insights without maintaining multiple QuickBooks Online accounts.
Common Mistakes to Avoid in QuickBooks Online
• Not reconciling bank and credit card accounts monthly
• Leaving uncategorized transactions in the banking feed
• Creating duplicate income or expense accounts in the chart of accounts
• Editing transactions in closed accounting periods
• Recording expenses instead of bills when tracking accounts payable
• Not matching bank feed transactions with existing invoices or payments
• Incorrectly categorizing owner withdrawals as business expenses
• Deleting transactions instead of properly correcting or reversing them
• Not setting up products and services with the correct income or expense accounts
• Ignoring aging reports for overdue receivables and vendor payables
Frequently Asked Questions (FAQs)
Q1. How to use QuickBooks Online for beginners?
Start with proper chart of accounts setup, sync bank accounts, then record invoices and bills regularly. Perform monthly reconciliation.
Q2. How to create invoice in QuickBooks Online?
Click + New → Invoice, select customer, add product/service, save.
Q3. How to reconcile bank in QuickBooks Online?
Go to Settings → Reconcile, enter statement balance, match transactions until difference is zero.
Q4. How to categorize transactions in QuickBooks Online?
Review bank feed transactions and assign the correct income or expense account before adding.
Q5. What is the difference between bill and expense in QuickBooks?
A bill creates accounts payable. An expense records immediate payment as expense without recording accounts payable.
Final Thoughts
Learning how to use QuickBooks Online is about understanding structure and maintaining discipline. From syncing bank accounts and categorizing transactions in QuickBooks to recording invoices and performing bank reconciliation in QuickBooks Online, each step builds reliable financial records.
When implemented properly, QuickBooks Online becomes a powerful accounting system that supports clean bookkeeping, strong internal controls, and informed financial decision-making.
Author Note
This guide is prepared by a Chartered Accountant-led accounting team supporting US CPA firms and growing businesses with structured bookkeeping and QuickBooks Online implementation.